


Online Giving
Email List!
UMCHP Events
Live/Rec. Streaming
Sunday, 10 AM, YouTube Live Stream Link:
YouTube.com/@umchpny
Click here: Worship UMCHP YouTube Channel
![]()
The service is always recorded on YouTube and can be viewed usually on Mondays following the service. The delay is due to YouTube's copyright enforcement. Just click on the above link to go to a library of our services.

Here you will find instructions on how to create and edit articles using the Joomla Content Management System this website uses. Please note that you must be cleared to author content on the website in order to add or edit content on the website.
Please not that if you are a part of the Monday Night Light class, you will need to make sure that you log into the shadow site that is set up to help us to learn and experiment without using the production sight. Make sure that your URL looks like this:
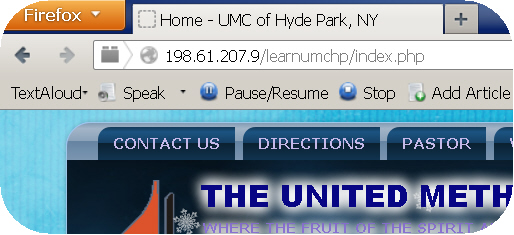 http://198.61.207.9/learnumchp/index.php
 |
If you have not yet logged in, please do so now by clicking on the red "Log in" button on the left side of the screen. Use the user name and password that you created or were given when you registered with the site. If you choose to create a new registration, you will need to be activated by the administrator before you can use your log in. |
| You will now notice that a different set of menu items is displayed. One opting to select is titled "Author." You will be using this menu item to add or modify content on the website. Click it now. |  |
You should see an image similar to the below:

On this screen one can filter the articles that are visible by either content, category, author, or created date. One can then select a previously started article for editing.
We are interested in adding a new article to the site, so click on the "New article" button on the right side.
One should now have a screen that looks similar to the following:

One's FIRST task is to come up with a title for the article you will be writing. Remember that the title will be the first thing that people see when they open the page.
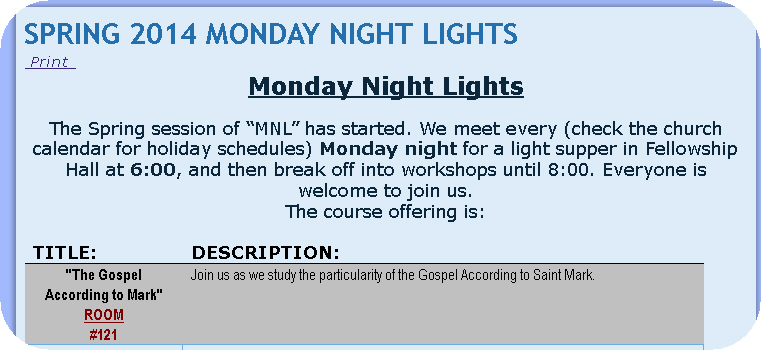
In the following example:
Title = "SPRING 2014 MONDAY NIGHT LIGHTS"
First line of article = "Monday Night Lights"
Now that the article has a title, the main body of the article can be written in the big white box under all of those little icons.

One can place a picture in our article (acceptable types are *.jpg, *.gif, *.png) either by selecting a picture one has used before or by uploading one from one's computer. Click on the "insert/edit image" button from the icons listed above the main article. Notice that if one put one's mouse over (hover) an icon, it displays the name and use of the icon. The picture icon looks like this:

When you click it you will be presented with a dialogue box that looks like this (please note the RED explanatory text and arrows):

Other than the file handling options there are a number of choices you have to make in this properties box. The "URL:" section will be filled in automatically when you select a graphic. The "Alternate Text" box is the text that will appear if the user is unable to load the graphic. The boxes that follow this are a little more important.
Dimensions:
1) Keep it proportional- otherwise your picture will look distorted
2) Make sure that the first value does not exceed 600 pixels. This is the limit of the column.
Alignment:You will need to play with the "Alignment" settings to get the look you want. Keep an eye on the preview pane to the right and see what changes when you apply each setting.
Margins:
Margins are how many pixels to the different side of you picture you want the other elements to flow. You can make these propotional, all sides the same, or you can adjust each one to suit how you want your article to flow.
Click the "Insert" button when you have finished and your picture will be placed where your cursor was positioned.
To change the properties of a graphic:
Click on the graphic. Click on the "insert/edit image" button from the menu. Make the changes and click the "Update" button at the bottom.
Note that the "Refresh" button will refresh the file and directory panes of the dialogue box.
You have a couple of other details to fill in. You will find a list of properties underneath the place you wrote your article that looks like this:

Category: This will be assigned by your office in the church. For the MNL course it will be "EDU."
Tags: Leave it alone.
Author's Alias: You can use another name as an author.
Status:
You can choose one of the following:

Published: Up and on the site.
Unpublished: Still active and working on it before it goes up.
Archived: Long term storage.
Trashed: Bye, Bye.
Featured: Usually select "No," so that your article is not put on the front page of the website.
Start Publishing Date: Next you will want to select when you would like to start publishing the article. Click on the small button under the text box for start date will reveal a small calendar that you can select when you would like to have your article start being published.

Finish Publishing Date: Same thing to do for the "Start Publishing Date." In this way you can line up articles to automatically publish and finish publishing themselves.
Status:
You will have the following options:

You will usually select "Public," viewed by the whole public, or "Registered," where you have to be registered with the website to see the article.
Make sure that you click the "Save" button at the top of the page:

This will take you back to the "Author" page, but you will find your new article in the list.